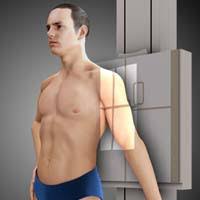
Shoulder Radiography
Shoulder Radiography
1. Shoulder AP (15 Degrees) Erect
Position of patient and cassette
पेशेंट के affected शोल्डर को इमेज रिसेप्टर के सामने रखते हुए पेशेंट को खड़ा करते हैं तथा patient को 15 डिग्री external rotation देते हैं जिससे की patient का प्रभावित शोल्डर कैसेट के पास आ जाए तथा acromioclavicular joint का plane cassette के समान्तर हो जाए । arm को supinated करते हैं तथा थोड़ा body से दूर abduct कर देते हैं। medial तथा lateral epicondyle को जोड़ने वाली लाइन को कैसेट के समांतर रखते हैं । इमेज रिसेप्टर के upper border को शोल्डर से 5 सेंटीमीटर ऊपर रखते हैं। पेशेंट को उसके head को examination side से दूसरी ओर rotate करने के लिए कहते हैं ताकि chin clavicle के medial end पर superimposed ना हो ।
Direction and centring of the X-ray beam
Collimated horizontal x-ray beam के सेन्टर को scapula के coracoid process के ऊपर रखते हैं। central ray upper glenoid space से गुजरनी चाहिए जिससे कि humerus तथा acromion process separate(अलग) दिखाई दे।
Essential image characteristics
इमेज में humerus का head तथा proximal end, स्कैपुला का inferior angle तथा clavicle आदि शामिल होने चाहिए। इमेज Arrested respiration की स्थिति में होनी चाहिए।
2. Shoulder Supero-Inferior (Axial)
Position of patient and cassette
पेशेंट को x-ray table के पास इस तरह से बैठ आते हैं कि उसकी affected साइड के कैसेट की ओर हो। इमेज रिसेप्टर को table top पर रखते हैं तथा arm को टेबल पर abduct करते हैं। पेशेंट को टेबल की ओर झुकाते हैं जिससे object to film distance{ OFD } कम हो जाती है तथा glenoid cavity इमेज में शामिल हो जाती है। elbow joint को flex कर सकते हैं लेकिन shoulder abduct ही रहना चाहिए न्यूनतम 45 डिग्री तक injury permitting के अनुसार । यदि shoulder का abduct सम्भव नही हो पाता है तो पैड का उपयोग करके OFD को कम कर सकते हैं।
Direction and centring of the X-ray beam
Collimated vertical x-ray beam के centre को gleno-humerus joint पर रखते हैं।
Essential image characteristics
इमेज में glenoid cavity तथा humerus का head दिखाई देना चाहिए।
3. Shoulder Infero-Superior (Reverse Axial View)
इसे Supero-inferior के alternate projection के रूप में काम मे लेते हैं।
Position of patient and cassette
पेशेंट को supine पोजिशन में लेटाते हैं तथा affected arm को abduct करते हैं और arm को supinated condition में रखते हैं । कैसेट को vertically शोल्डर के सामने रखते हैं तथा कैसेट को neck की ओर दबाते हैं जिससे कि जितनी हो सके उतनी scapula include हो सके।
Direction and centring of the X-ray beam
Collimated horizontal x-ray beam के सेन्टर को minimum angulation trunk की तरफ रखकर axilla की तरफ देते हैं।
Essential image characteristics
इमेज में head of humerus , acromion process , coracoid process तथा glenoid cavity of scapula दिखाई देने चाहिए।
Note-: इस इमेज में Supero-inferior इमेज की तुलना में कुछ advantage होता है कि इसमें कैसेट को सही से सोल्डर पर positioned कर सकते हैं तथा पेशेंट अगर कम abduction अवस्था में हो तो भी यह प्रोजेक्शन किया जा सकता है।
3. Shoulder Lateral Oblique ‘Y’ Projection
यदि पेशेंट की arm immobilized तथा abduct नही हो पाती है तो lateral oblique ‘Y’ projection का प्रयोग करते है। इसके लिए "24 × 30" cm की कैसेट का उपयोग करते हैं।
Position of patient and cassette
पेशेंट को कैसेट के सामने इस तरह से खड़ा करते हैं कि affected shoulder का lateral part cassette के contact में हो। इस स्थिति से पेशेंट anterior side में इस तरह से rotate करते हैं कि unaffected shoulder image receptor से 60 डिग्री का angle बनाये । तथा scapula के medial तथा lateral border को जोड़ने वाली लाइन कैसेट से right angle( 90°) पर हो।
Direction and centring of the X-ray beam
Collimated horizontal x-ray beam के centre को scapula के medial border की ओर humerus के head पर रखते हैं।
Essential image characteristics
Scapula की body कैसेट के लम्बवत होनी चाहिए तथा scapula और humerus के proximal end ribs से दूर दिखाई देनी चाहिए ।


Comments
Post a Comment